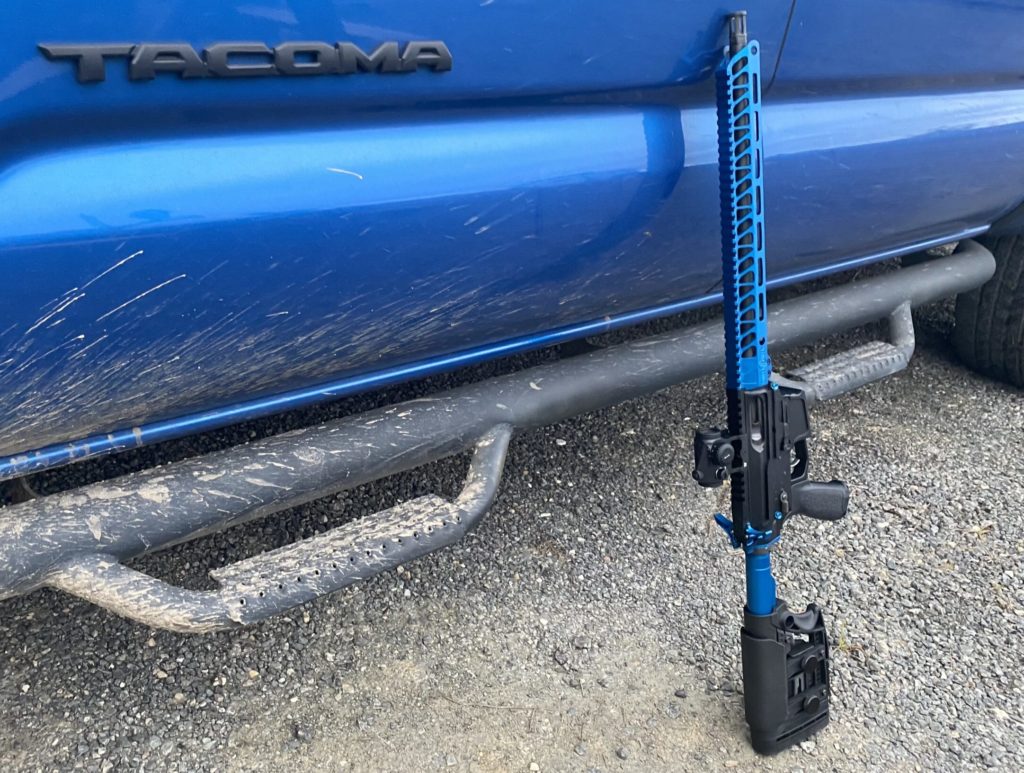
If you had told me even 2 years ago that I would be building a rifle at any point in my life, I would’ve laughed at you. Learning anything in the gun industry takes what feels like an eternity to learn, but that’s part of what I love about it. Google and having friends in the industry that know what they’re doing have been my two best friends through this process. So I’m going to talk about building a rifle, what I love about the parts I chose, and update this blog throughout the process.
I’ve been competing in 3 gun, 2 gun, and carbine matches now for over a year (I’m considered a noob in the industry), but have been shooting firearms for as long as I can remember. This past year has been solely about testing my guns and my gear at matches to see what works and what doesn’t. I’ve definitely broken a few things along the way which means I’m doing something right.
One of the biggest lessons I’ve learned is to try and test out as many things as possible before settling on anything. What I mean by this is go to demo days at ranges, ask friends to try their guns, say yes if someone offers to let you shoot something of theirs, and even dry fire and get a feel for things at a firearms store. Research parts, reviews, manufacturers, and take advice from experts that have used different parts and gear longer than you have. Seeking mentorship during this process has cut out a lot of hard lessons I’m sure I was going to learn.
My inspiration for this entire thing is obviously, Star Wars. Thank you Disney stormtroopers for putting up with my shenanigans this spring!


I was always told to build your gun around your barrel. Ballistic Advantage makes incredible quality barrels. For competition, I wanted a barrel that was lightweight but can shoot accurately at distance. I chose an 18-inch fluted rifle length barrel chambered in .223 Wylde. One of the best things about Ballistic Advantage is their guarantee. “All Ballistic Advantage barrels are guaranteed to give sub Minute of Angle (MOA) accuracy with match grade ammunition.” When you’re starting a build, look no further than Ballistic Advantage.

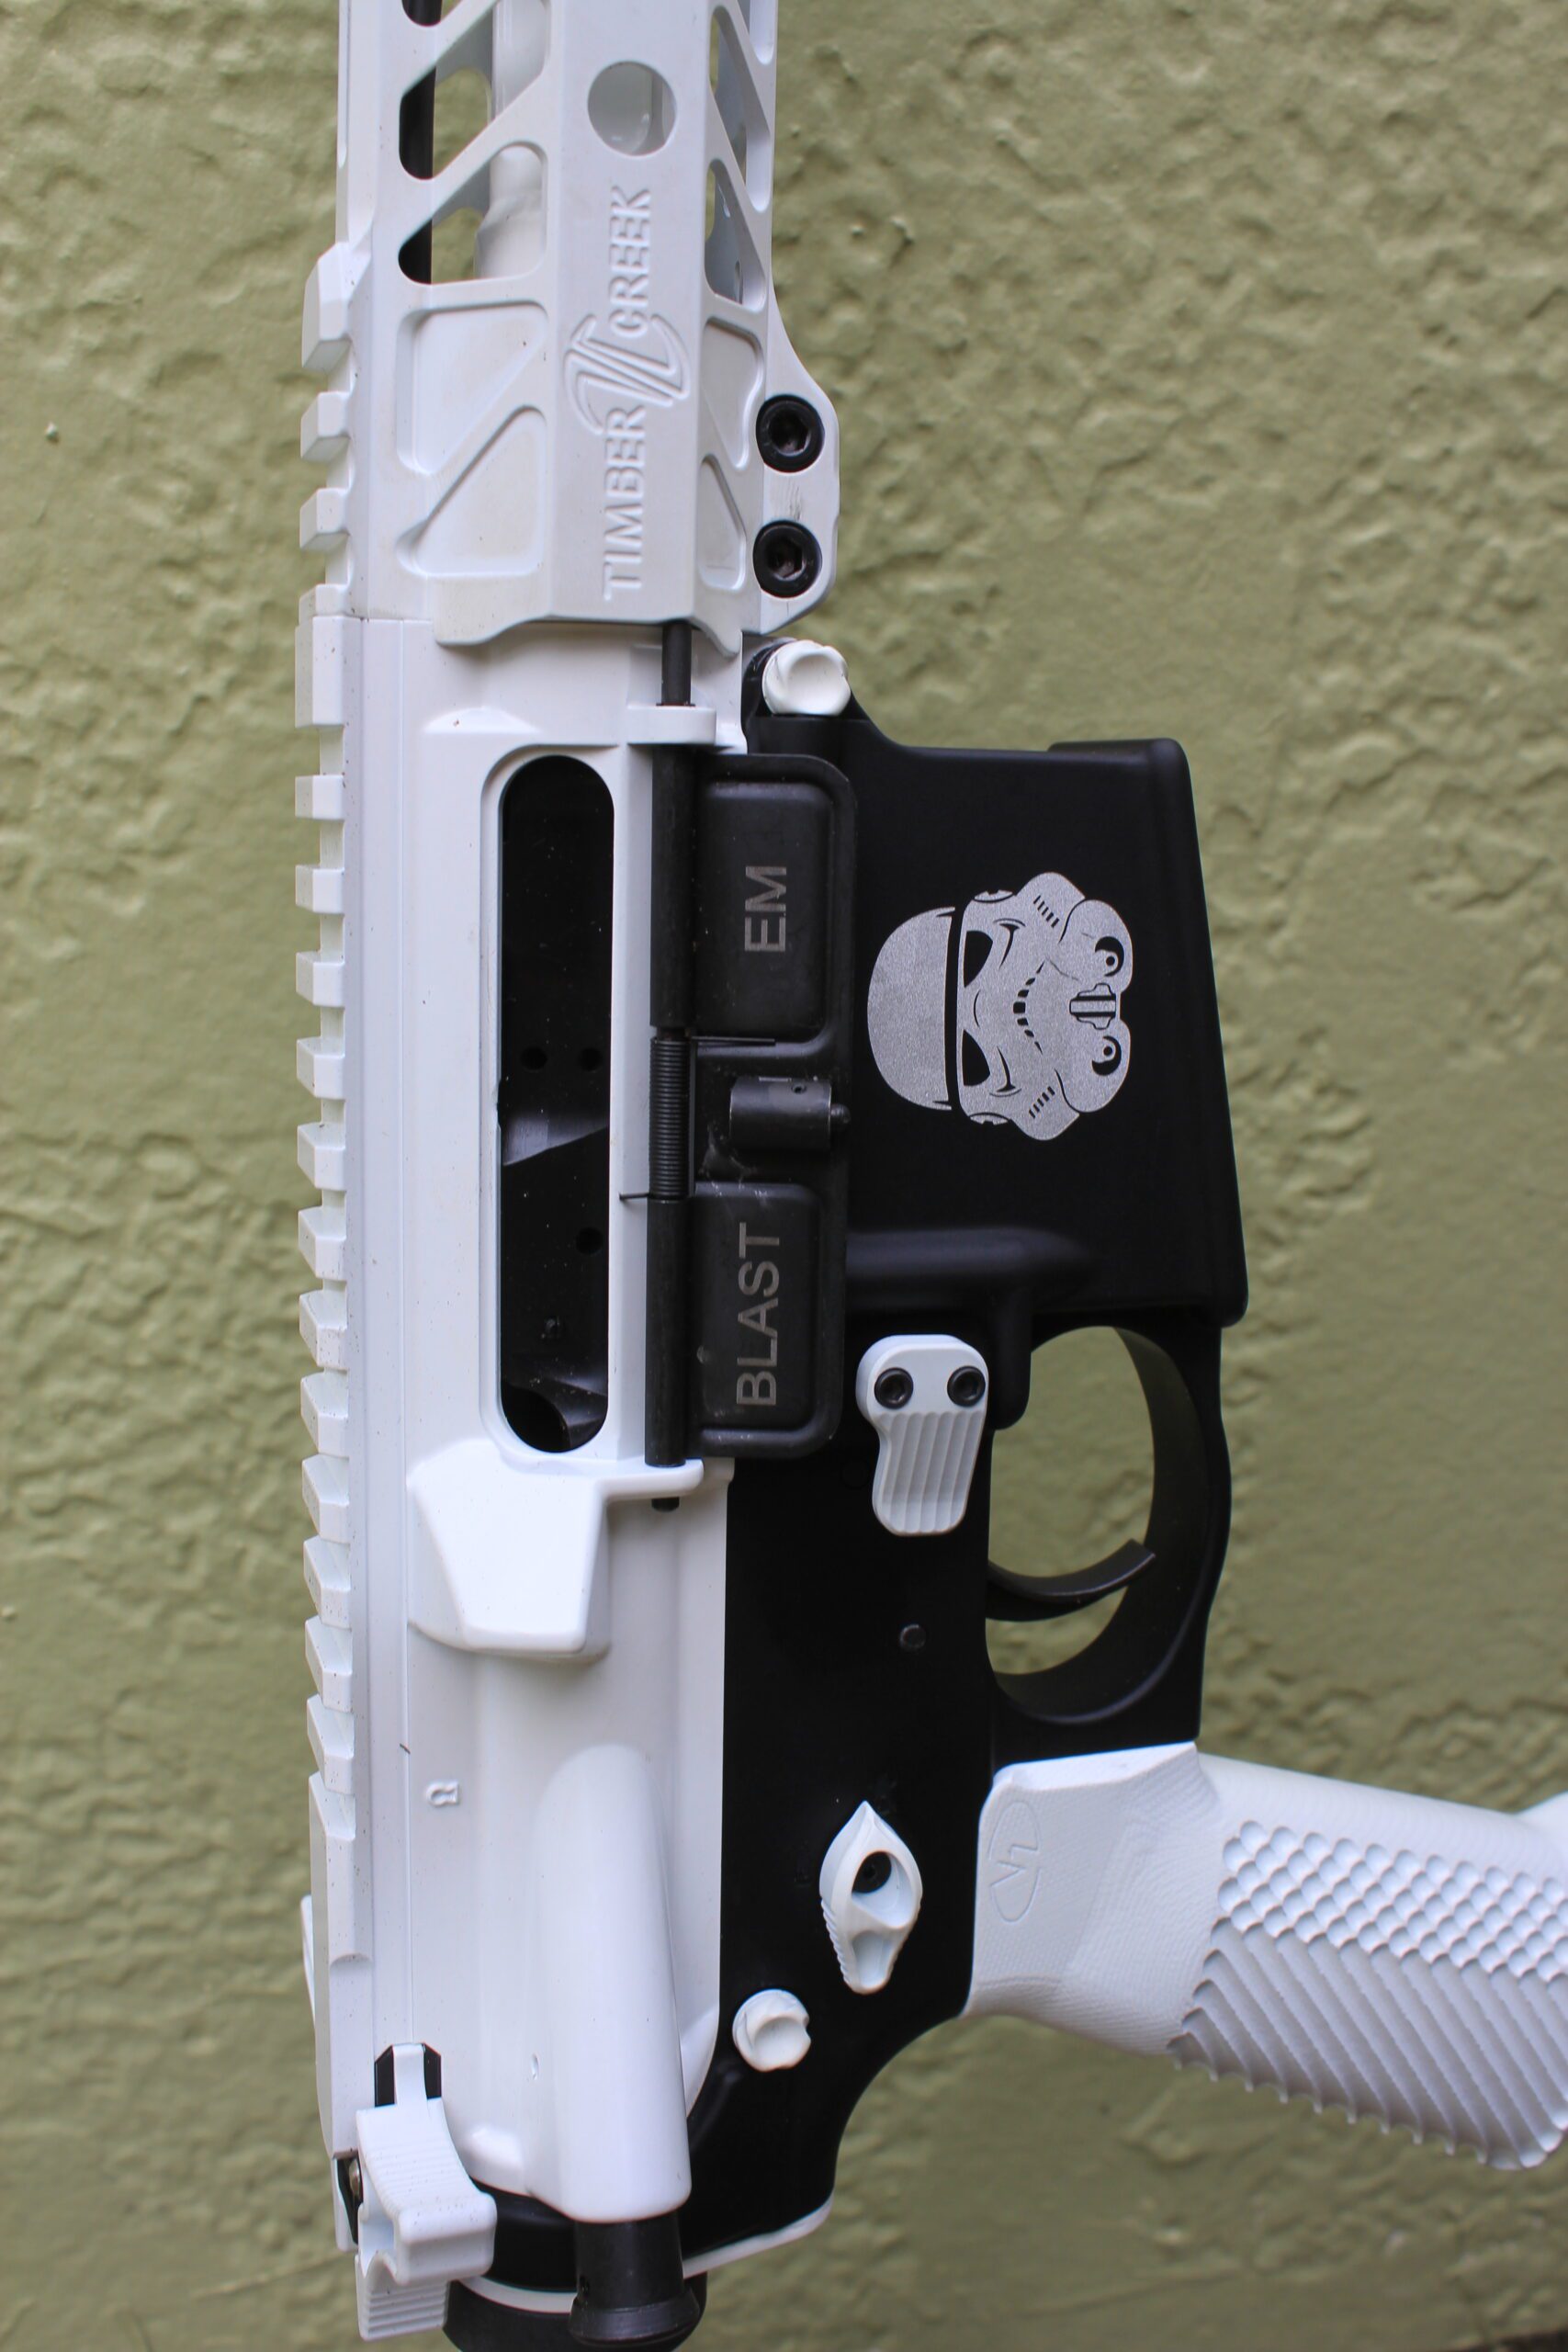
I was introduced to Timber Creek Outdoors about a year ago and fell in love with their products. Besides the vibrant, fun colors, their parts actually improved my ability to manipulate my rifle. The oversized ambidextrous charging handle made it a lot easier to find and way easier to chamber a round. The other part that really helped my rifle is the extended magazine release. If you’re running a stock release, kudos to you, because that small circle was hard to find in the moment. Lastly, putting an ambidextrous safety on my rifle came in handy more than I ever knew it would. I built my PCC with their parts and love their lightweight handguards. This rifle will feature just about all the parts from their full rifle build kits.

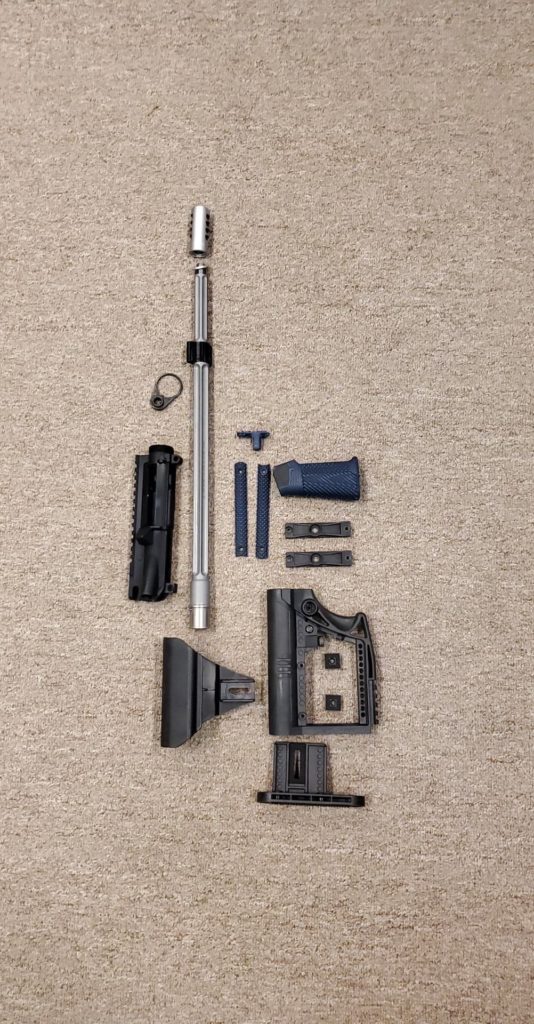
Their builders kit is exactly what you need to get started with your custom rifle build. It comes with everything shown below with the hardware kit located in the buffer tube!

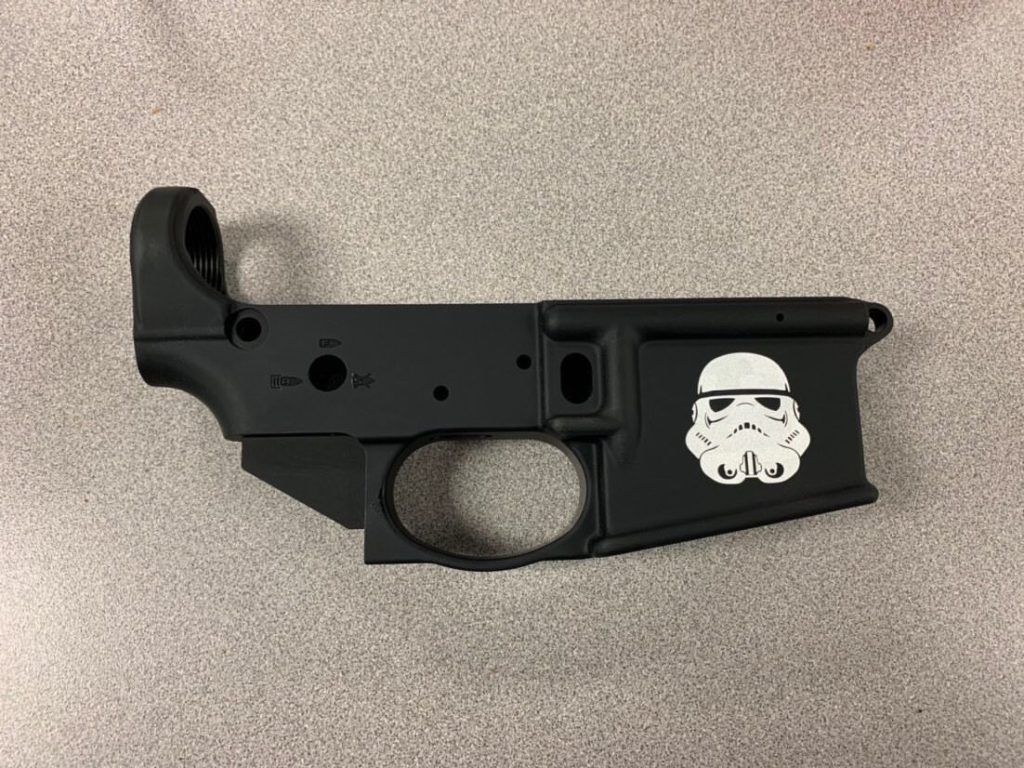
If you’re looking for fun and laughter mixed in while you’re building a rifle, look no further than DoubleStar. I had the pleasure of meeting Nick at SHOT SHOW and I highly recommend tuning in to one of their “Pew Pew and Stabby” shows on Instagram or Facebook. These guys put a Stormtrooper head on my stripped lower almost immediately after I purchased it, sent me a photo <3, and it was delivered to my FFL in no time. If you look at their engraving options, they’re hysterical. I gave them a call to see if they could do my custom stormtrooper so don’t hesitate to ask and see what they can do! Lastly, I bought their complete flattop upper receiver so I didn’t have to order a bunch of parts.
When building a rifle, I learned that choosing the right stock for your cheek weld is very important. If you’re planning on running a dot or iron sights this may not be as important, but if your planning on mounting a scope, having an adjustable, yet customizable stock is needed. That’s why I use Luth-AR stocks on my competition rifles. The cheek weld is adjustable so you can set it up perfectly to get a good field of view out of your scope. The stock adjusts as well so you can adjust your length of pull.
Here is the full parts list:
- Ballistic Advantage 18″ .223 Wylde SPR Fluted Stainless Steel Rifle Length AR 15 Barrel, Premium Series
- TBD Trigger
- DoubleStar Complete Flattop Upper Receiver and Stripped Lower Receiver
- Luth-AR MBA-3 Stock Assembly, MBA-3
- Timber Creek Outdoors Build Kit (the parts I’m using – comes with more): 15” MLOK Handguard, Oversized Trigger Guard, Ambi-Safety, Extended Magazine Release, Takedown Pins, End Plate, Buffer Tube
- Aero Precision AR15 Lower Parts Kit, Minus FCG/Trigger Guard/Pistol Grip
- JP Enterprises.750 Adjustable Gas Block, Stainless Steel
- Kynshot Hydraulic Buffer Ar-15 Carbine W/Collapsible Stock 5.56/.223
- Brownells M16 Lightweight Bolt Carrier Group
- VZ Grips AR-15 VZ Operator II – Gen 2 Rifle Grip, M-LOK Rail Panels, and Slide Stop
- Seekins Precision Enhanced Bolt Catch
I sent some parts of to get cerakoted at The Armory Guns and Ammo and they did not disappoint. Tim is an expert at cerakote and really fun to work with to complete your dream build!
-
Before Cerakote -
-

After Cerakote
That’s it so far! I’m so excited to get to the building part and learn some more things on the way. Stay tuned for new updates on building a rifle and drop your comments below on things I need to know, what you learned, how your first build went, and more. Would love to hear them!
Update: Rifle built, but not yet fired
Well, I did it! With much needed help, that is. The feeling of building something custom for yourself with pieces and parts you’ve picked out is extremely rewarding. Knowing how to tinker with things is a lot less scary when you’ve built something from scratch and know where everything goes.
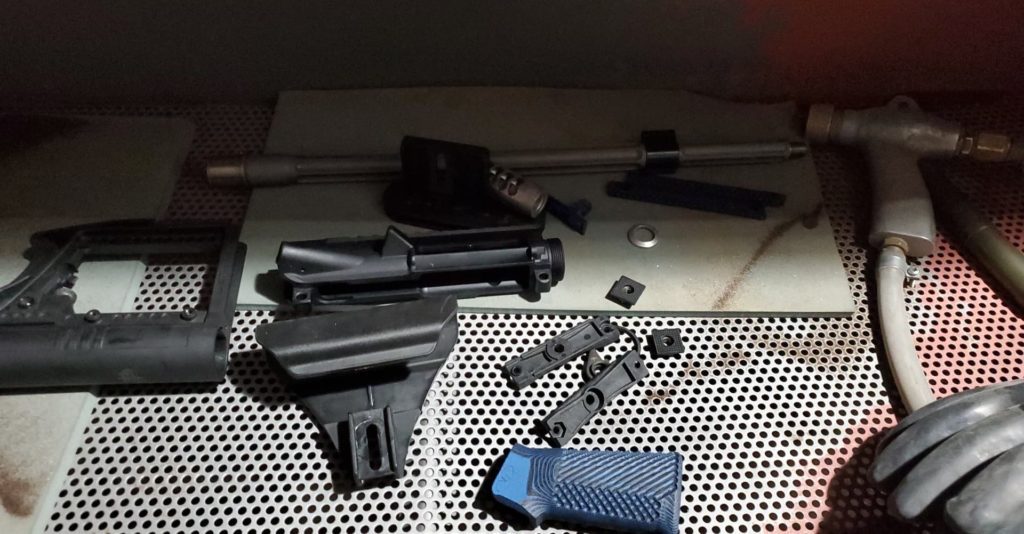
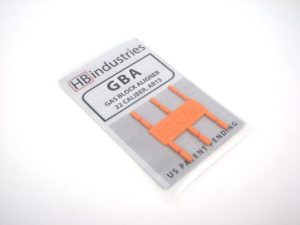
We started with the upper build first. One of the biggest pro tips my friend who taught me how to put the rifle together was to use an AR15 Gas Block Aligner when trying to line up the gas tube hole. It takes the guesswork right out using this tool and the plastic can be broken with a cleaning rod where the two pieces break in half to come out of the barrel.
I also learned that when building a rifle, it’s important to lap and true your rifle upper, especially since cerakoting your parts can change things. Brownells makes a handy video on how to do this process.
Torquing down the barrel nut properly was one task I couldn’t complete on my own. You need a workshop vice to be able to hold the upper while you complete this task. Depending on the barrel and barrel net, making sure you have the specs to torque this to is important in the building process. Once that’s complete, putting on your favorite hand guard and muzzle break is easy to do!
The lower assembly was challenging, but the most fun in my opinion. Learning how to use roll pins, punches, and how things go together in the lower was fascinating. The most detail-oriented piece for me was learning how to set the safety in to set at 45 degrees instead of 90 degrees. If you’ve ever looked through a lowers part kit, the detents are what really make everything work. Jazzing up the lower with Timber Creek parts really made this build pop with the white pieces against the black.
A pro tip I learned was instead of using a roll pin with the take down pin closest to the buffer tube was to instead instead insert the detent and spring from the back of the lower where your QD endplate should go. The spring doesn’t have to depress as far down or be cut so there’s less chance of losing parts and spring length.
Assembling the castle nut was also not something I could do on my own just yet. Getting that piece on and assembled at just the right spot was interesting to learn, but a challenge. I still couldn’t describe that process perfectly to you all so I won’t attempt just yet.
Function testing that the trigger group works correctly is important before putting the lower onto the upper. You can “dry fire” function test it by pulling the trigger while keeping your other hand depressed on the hammer so it doesn’t hit the receiver. This can cause issues and cracking if you dry fire it without blocking it from going forward at speed.

Assembling the buffer spring and buffer was fun and simple (make sure you have the right size spring for your buffer tube/gas system), but the most exciting part is assembling everything together and seeing how it all functions together! I’m excited to say this build is almost complete. A new trigger is needed, a different muzzle brake is on the way, and a live-fire test with adjusting the gas and muzzle brake system is needed to prove itself yet!
More to come once the final pieces arrive and I’ve spent some time with it at the range!